Monday, October 7, 2013

DIY - Gorgeous Girl Painting in Canvas

Hello my friends!!!

This week is a bit messy for me, but at least I do have time to have great blogger friends in my blog. This week I have a new friend Irene that is also a mother, a very talented artist and a new blogger....LaCameraFelice! Her creations??? Just adorable...all of them. Cute paintings for your prince and beautiful unique creations for your princess. 

It is my honor to have her with a tutorial post, sharing with us the procedure how to create a beautiful girl painting with beautiful materials in a canvas.  


Just enjoy it...it is very interesting.

**********************************************


Materials :
1. Canvas size 18x24 cm
2. Scissors
3. Tracing paper
4. Acrylic yarn for crafts
5. Felt
6. Ribbon
7. Thread and needle
8. Button
9. Liquid glue
10. 3 brushes (1 medium, 1 thin & 1 old for the glue)
11. Watercolor pencils (black, brown, light blue, pink and red)


1ο step


Cut the yarn into 40 strips of 1 meter length. Leave one end 8 cm margin and begin to put together a braid until you let another 8 cm on the other side.  Cut another 20 strips of length 10 cm and tie them in the middle with yarn. Place the braid on the canvas as if embracing an imaginary face. Put the other yarn that is tied in the middle as a bang in the face and trim it with scissors.


2ο step


Take the black or brown colored pencil and form the face, neck, eyes, the nose and mouth.


3ο step


Remove the braid from the canvas and start making a collar. Place the tracing paper at the surface where the neck is. Carry a slightly curved line from one side of the neck to the other. Remove the tracing paper from the canvas and continue with curves to finish the collar. Cut the pattern of the collar and pin it on the felt. Follow the pattern and cut the felt.


4ο step


Begin to color the face with the watercolor pencils. Color the iris blue and the pupil black leaving two small circles within it white. Make the lashes and paint pink the face with a blue background (no need to color the surface where you put the braid). Then dip the middle brush into a cup of water, drain it and pass strokes over the large surfaces. Repeat that in order to obtain the result of watercolor. For the eyes use the small brush. No need to pass the brush over the lines which have formed the eyes, nose, mouth, eyelashes.


5ο step


Sew the button on the collar and turn it upside down to place the glue, you can also place the glue on the surface of the canvas or on both surfaces. Glue the collar. Trim the ends of the braid, tie on a ribbon and place the glue on the back of the braid and glue it on the canvas. Put glue on the point of the canvas that will glue the bang and push it a bit to stabilize. Finally with the red pencil put a few freckles on the girl’s face.


Tips
1.       Instead of watercolor pencils you can use oil crayons, acrylics or oils
2.      Instead of felt you can use fabric, scrapbooking paper, lace, tulle. The options are many if there is imagination.
3.      You can pass a thin wire in the pigtails to turn.
4.      The collar can have various shapes.

5.      Do not be afraid of colors and materials, there are infinite combinations.


and in Greek....

ΥΛΙΚΑ :
1. Καμβάς διαστάσεων  18x24 cm
2. Ψαλίδι
3. Ριζόχαρτο
4. Μαλλί πλεξίματος ακρυλικό για χειροτεχνία
5. Τσόχα
6. Κορδέλα
7. Κλωστή & βελόνα
8. Κουμπί
9. Ρευστή κόλλα κρυσταλιζέ
10. 3 πινέλα (1 μεσαίου μεγέθους ,  1 λεπτό & 1 πρόχειρο για την κόλλα )
11. ξυλομπογιές ακουαρέλας (χρώματα : μαύρο, καφέ, γαλάζιο, ροζ, κόκκινο)

1ο βήμα
Κόβουμε το μαλλί  σε περίπου 40 λωρίδες με μήκος 1 μέτρο. Πιάνοντας τις λωρίδες μαζί, δένουμε τη μία άκρη αφήνοντας  7 εκ. περιθώριο και αρχίζουμε να φτιάχνουμε μία πλεξούδα ώσπου να αφήσουμε άλλα 7 εκ. στην άλλη άκρη. Κόβουμε άλλες 20 λωρίδες μήκους 10 εκατοστών και αφού τις πιάσουμε ματσάκι τις δένουμε στη μέση πάλι με μαλλί. Τοποθετούμε την πλεξούδα πάνω στον καμβά σαν να αγκαλιάζουν ένα νοητό πρόσωπο. Βάζουμε το ματσάκι σαν αφέλειες στο πρόσωπο και τις ψαλιδίζουμε ώστε να ευθυγραμμιστούν.

2ο βήμα
Παίρνουμε τη μαύρη ή την καφέ ξυλομπογιά και σχηματίζουμε το πρόσωπο, τον λαιμό , τα μάτια τη, μύτη και το στόμα.

3ο βήμα
Αφαιρούμε τα μαλλιά από τον καμβά και πάμε να φτιάξουμε έναν γιακά. Τοποθετούμε το ριζόχαρτο στο σημείο του λαιμού. Φέρνουμε με ελαφρά καμπύλη από τη μία άκρη του λαιμού στην άλλη τη γραμμή της λαιμόκοψης. Βγάζουμε το ριζόχαρτο από τον καμβά και συνεχίζουμε με καμπύλες να τελειώσουμε τον γιακά. Κόβουμε το πατρόν του γιακά και το καρφιτσώνουμε στην τσόχα. Τέλος ακολουθώντας το πατρόν κόβουμε την τσόχα.

 4ο βήμα
Αρχίζουμε να χρωματίζουμε το πρόσωπο στον καμβά με τις ξυλομπογιές. Χρωματίζουμε την ίριδα γαλάζια &  την κόρη του ματιού μαύρη αφήνοντας 2 μικρούς κύκλους μέσα σε αυτήν άσπρους. Φτιάχνουμε τις βλεφαρίδες και βάφουμε ροζ το πρόσωπο και γαλάζιο το φόντο (εκεί που θα τοποθετήσουμε τα μαλλιά δεν χρειάζεται να το χρωματίσουμε όλο) . Έπειτα βουτάμε το μεσαίο πινέλο μέσα σε ένα φλιτζάνι με νερό, το στραγγίζουμε και περνάμε τις πιο μεγάλες επιφάνειες. Επαναλαμβάνουμε ώστε όλος ο καμβάς να αποκτήσει το αποτέλεσμα της ακουαρέλας. Για τα μάτια χρησιμοποιούμε το μικρό πινέλο. Τις γραμμές όπου έχουμε σχηματίσει τα μάτια, τη μύτη, το στόμα, τις βλεφαρίδες δεν χρειάζεται να τις περάσουμε με πινέλο.

5ο βήμα
Ράβουμε το κουμπί στον γιακά και τον αναποδογυρίζουμε για να βάλουμε την κόλλα με το πρόχειρο πινέλο, μπορούμε επίσης να βάλουμε μόνο στο σημείο του καμβά που θα μπει ο γιακάς ή και στις δύο επιφάνειες. Κολλάμε τον γιακά. Ψαλιδίζουμε λίγο τις άκρες στις κοτσίδες, τις δένουμε μια την κορδέλα και βάζουμε στο πίσω μέρος τους κόλλα και τις κολλάμε στον καμβά. Βάζουμε κόλλα στο σημείο του καμβά που θα κολλήσουμε τις αφέλειες και τις πιέζουμε λίγο για να σταθεροποιηθούν.  Τέλος βάζουμε με την κόκκινη ξυλομπογιά λίγες φακίδες στο κοριτσάκι.

Συμβουλές
1.       Αντί για ξυλομπογιά ακουαρέλας μπορείτε να χρησιμοποιήσετε κηρομπογιές , ακρυλικά χρώματα ή λάδια.
2.       Αντί για τσόχα μπορείτε να χρησιμοποιήσετε ύφασμα, κόλλες για scrapbooking, δαντέλες, τούλια. Οι επιλογές είναι πολλές εάν υπάρχει φαντασία.
3.       Στις κοτσίδες μπορούμε να περάσουμε και λεπτό σύρμα ώστε να γυρίζουν.
4.       Ο γιακάς μπορεί να έχει διάφορα σχήματα.
5.       Μην φοβάστε τα χρώματα και τα υλικά, μπορεί να γίνουν άπειροι συνδυασμοί.

**********************************************


Amazing isn't it? Just visit irene's blog and you will be surprised by her creations....

You will find her in:

Etsy Shop: lacamerafelice
Facebook: lacamerafelice


Thank you Irene!!!!


       mats mouts
post signature

Sunday, October 6, 2013

SWEET DREAMS...


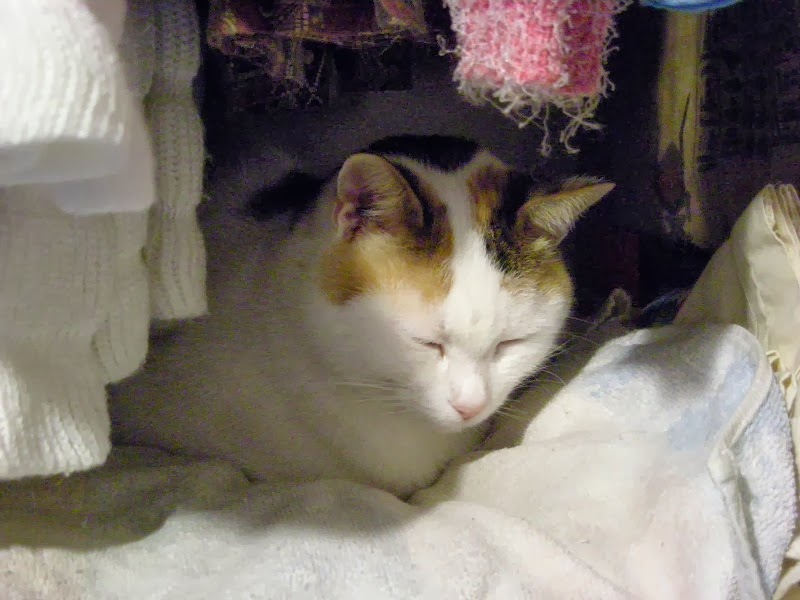
The days are getting colder and Zoe has started going back to her winter habits... She loves to sleep in my closet! She has her own little blanket (ie towel) and she loves her cozy little place! :)


Friday, October 4, 2013

I won a beautiful tote bag!!!!

wow..this year for me it was awesome regarding the give-aways  I have won so far a few and all of them had amazing gifts as rewards. 

My latest acquisition is a beautiful and unique tote bag from Daphne! Yeap, I have won the giveaway in Etsy Greek Street Team blog and the gift was a really cute tote bag from messymai shop.  


This creation is beautiful hand crafted, with two beautiful silk screen printed by hand (with eco water based child friendly inks) owls. An accessory  perfect for the beach, your shopping, your excursions. 


I use it almost every day and especially when I have my daughter with me...too many small things to carry all the time.


If you wish to check more beautiful creations by Daphne  ( like cards, tote bags, animal pins) just visit her etsy shop and you will be surprised!!!!


Have a wonderful Weekend!!!
post signature

Fashion Trends - Casual Autumn

It was about time to hide the Summer t-shirts in my closet. Autumn is here and so my big belly... yeap we are big enough. So I have to use clothes that will be comfortable and maybe stretchy. And what is the best way rather a casual outfit? Beautiful Black and greyish shades, flat shoes, beautiful shirts and a beautiful detail like an asymmetrical bolero.

Post simple earrings and a statement uncommon necklace and I am ready....

1.Jersey 2.Necklace 3.Earrings 4.Shoes


Pregnant or not, this outfit is really comfortable and chic!!!


      Happy Friday!!!
post signature

Thursday, October 3, 2013

Delicious Coconut Cake!!!

Hello my friends!

It is really great especially this time of the year ( I mean with the rain and the cloudy weather) to enjoy a cup of hot coffee with a piece of cake! Imagine now this cake to have Coconut!!! I just love Coconut and especially its aroma.

And it is even better if you can taste this cake from a good friend that cooks really amazing!!! So another guest post from my good friend Loula from Loulalalou. 

*****************************

Hello my friends..

I would love to share with you a really easy to make cake with coconut that you are going to love. This cake is my favorite since is my mother's recipe and reminds me my childhood. So let's start...


Ingredients:
1 1/2 cup sugar
2/3 cup butter
3 eggs
1 teaspoon baking powder
2 cups flour with baking powder 
1 cup chopped/powdered coconut

Υλικά
1 1/2 φλ. ζάχαρη
2/3 φλ. βούτυρο/μαργαρίνη
3 αυγά
1/2 φλ. γάλα
1 κουτ.γλυκού baking powder
2 φλ. αλεύρι που φουσκώνει μόνο του
1 φλ. καρύδα


Procedure
Preheat oven to 170 C.
Put all the ingredients in the mixer bowl and mix them together for 4 minutes.
Put the mixture into a buttered and floured cake tin and bake it for about 1 hour.
Let it to cool and sprinkle with sugar powder.


Εκτέλεση
Προθερμαινουμε το φουρνο στους 170C. 
Βαζουμε όλα τα υλίκα σε ένα μπωλ και τα ανακατευουμε για 4 λεπτα.
Τοποθετούμε το μείγμα σε ενα ταψι που το εχουμε βουτυρώσει και αλευρώσει και το ψήνουμα για 1 ωρα. 
Αφηνουμε να κρυώσει και πασπαλίζουμε με αχνη ζαχαρη.

Easy right? and delicious too.... buon appetite!

Kisses Loula

*****************************

I have already taste it and it is really a yummy cake. Thank you Loula!!!


And if you want to discover more about Loula, please meet her in

etsy shop: Loulalalou


      mats mouts
post signature

Wednesday, October 2, 2013

Children: Highs and Lows

High: Walking into the boys' room first thing in the morning to be greeted by gigantic, groggy smiles and high-pitched giggles.

Low: Sitting on the bedroom floor in front of my mirror (the outlets in our only bathroom have not worked for five years) trying to apply eyeliner while Ryan repeatedly hops in and out of my lap, yanking my hair to stabilize himself in the process (causing my head to bobble as if I were a dashboard toy) while Jacob is dangling dirty socks in front of my face (and blocking my mirror view) begging me over and over to smell them. It's a miracle any eyeliner comes within a millimeter of my eyes.

High: Kissing my two sweet boys goodbye and sniffing in one last whiff of their baby-shampooed heads as I rush off to work.

High: Walking in the door after work to be greeted by loud happy cries of "Mama! Mama! Mama!" With two pairs of arms bear hugging my legs and torso before I can even get my shoes off.

Low: Exactly 45 seconds after the bear hugs end, Ryan angrily empties an entire bag of fish crackers on the floor because I refuse to give him a sucker, Jacob is pouting and stomping his feet loudly across the floor screaming, "I WANT TO WATCH JEOPARDY!," neither child will finish his dinner, Ryan's tantrum turns into major diva drama as he flings his pathetic body on the floor and cries loudly into the fake hardwood, and at that precise moment, I walk into my room to discover that SOMEONE has emptied the contents of my make-up bag and colored all over my walls with eyeliner.

Low: I fall into the toilet trying to take a pee because SOMEONE forgot to close the toilet lid.

Low: A sticky, half-sucked-on sucker has wrapped itself in my favorite sweater.

Low: Poop. On. The. Floor. (Not mine.)

High: Ending the night with a much-needed Naked Dance Party


Tuesday, October 1, 2013

DIY - Romantic Candles with Lace and Colored Rice!!!

Hello my friends!!!

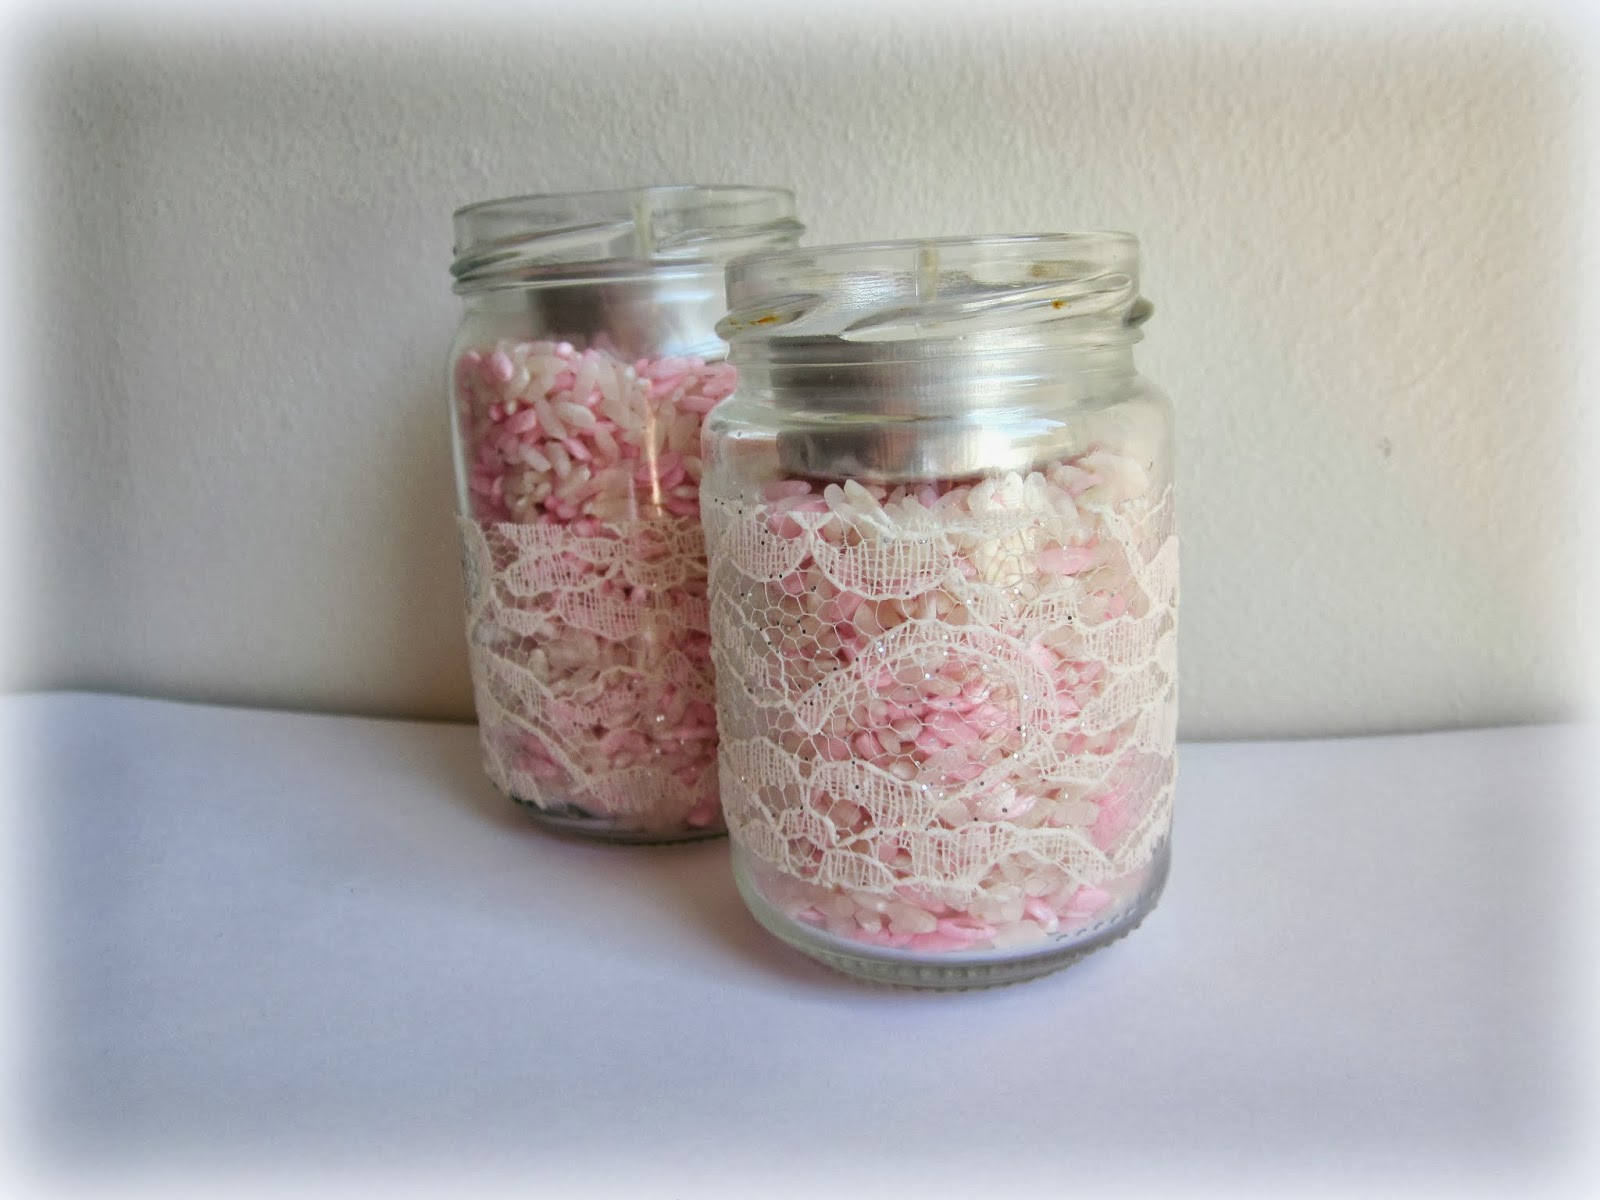
It was about time to post another easy tutorial and I have to say that this one is one of my favorites. Create Romantic Candles with  lace Band and in order to add more color, just fill them with handmade colored rice. A great creation perfect for a romantic dinner, for your fireplace or even for a unique party decor.


What will you need:
  • A small bottle or a small glass container like the one we use for marmalade. 
  • Rice 
  • Corrugated Paper of your favorite color
  • Stardust
  • Lace Band
  • White Glow
  • Brush


Procedure

So now we are ready to begin...

First of all use a the corrugated paper in a container with water and leave it for about 5mins. In another vessel add little of the white glow  and mix it with the stardust. The mixture will be used for glowing the lace band on the glass vessel and the stardust will give it a beautiful sparkle when it will dry.


Remove the paper from the water and add the rice, but not all of it. You can use the half of it and keep the rest in its white color. Add the rice in the vessel with the colored water and keep it there for about 5-10mins, depending how much you want  your rice to have a bright color or not.


Remove the rice from the water and spread it on a tower and let it dry. Your rice is ready to mix it with the rest of the white rice and the result is really beautiful. I use this trick on my wedding when I was preparing the rice that we use in the traditional Greek wedding, but I have corored it orange and not pink. 


Put the dried rice in the glass vessel and add a small candle! 


Your creation is ready!!! Isn't it beautiful and cute????


Happy crafting!!!

      mats mouts

post signature